Home Remedies: Sore Throat

coldLast week, my family was struck with a series of illnesses (strep, pink eye, ear infections, and a flu-like virus). So, I have been trying various home remedies for sore throat, dry cough, and congestion. Here is my analysis of ten home remedies (plus one suggested by the Champ).

Hot Chocolate

This was one of my favorite means of relieving both sore throat and dry cough. I attempted drinking hot chocolate made with water and with milk. The hot chocolate with milk seemed to provide the longest lasting relief. Perhaps, the milk coated my throat better.

Ice Cream

We look for any excuse to eat ice cream at our house! The ice cream did provide sore throat relief. However the downside to ice cream is that it tends to disappear quickly (and has the unwanted side effect of increasing our waistlines). I found the most relief with a mint cookies and cream shake (mint has been suggested as a home remedy).

Yogurt

We mostly ate yogurt to help relieve side effects from our antibiotics. However, the yogurt also provided some sore throat relief. Be sure to get a non-citrus variety for maximum comfort.

Steam Room

The most effective means of getting rid of my dry cough was creating a sauna in our bathroom. I closed the bathroom door, turned the hot water on high in the shower, and sat next to the shower for five to ten minutes. The best part about this method is that it works as a decongestant as well. We tried this one time with the Champ, and he did not like the steam. Other variations of this method may include a humidifier or simply taking a warm shower.

Chicken Soup

We let the Champ pick out “fun soup” at the grocery store to hold on to in the event of illness striking. He picked noodles in the shape of Frozen characters. However, his poor throat was too sore to consume the noodles. He did drink a little of the broth. The chicken noodle soup was pretty effective against my sore throat for at least thirty minutes of relief. It was one of the few non-dessert foods I was able to consume at the height of my illness.
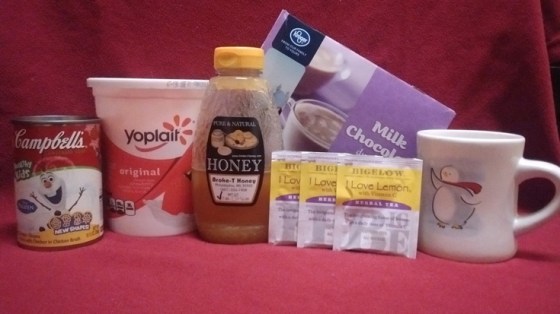
Honey

The Coach’s grandparents are bee farmers, so we consume a lot of honey at our house. Anytime the Champ is “sick,” he demands a spoonful before bed. This works better for us than cough drops for him because there is a much lower choking risk.

I highly recommend Broke T Honey! It is so much better than honey at the grocery store. It is raw honey and contains no chemicals or additives.

Warm Milk and Honey

I was not excited about trying this combination because I prefer my milk cold and unsweetened. However, I drank a cup of this before bed and my cough was greatly reduced throughout the beginning of the night.

Mock Hot Toddy

A hot toddy is a traditional alcoholic British drink (derived from India) used to relieve sore throat. We do not consume alcohol in our house, so a traditional hot toddy (made with whiskey) would not work here. But, the main non-alcoholic components (honey, lemon, and clove) are all great for sore throat.

Mock Hot Toddy
1 TBS Honey
1 tsp cinnamon
½ tsp nutmeg
½ tsp clove
1 cup hot brewed tea
1 TBS lemon

Stir all ingredients together for three minutes. Strain and serve warm.

Gargling Saltwater

I attempted to do a warm saltwater gargle. However, this did not seem to help the back of my throat much and I do not like the aftertaste that a saltwater rinse leaves behind. I also had trouble not coughing long enough to gargle.

Hot Tea

I love hot tea! My favorite herbal tea for sore throats is “I Love Lemon” by Bigelow. I add in a tablespoon of honey and this seems to be a great combination for sore throat. The steam from the tea also works as a decongestant.

Spaghetti and Breadsticks

This was the remedy suggested by the Champ (age 3).  A suggested remedy we did not try was garlic, so maybe he was on to something here. I went to Fazoli’s and bought him a kid’s meal. The effect was minimal; however, the breadstick was his first “meal” in three days.


*All of these methods were used to bring comfort to my family members. However, I am not a medical professional. This information should not be considered medical advice. Please see a medical professional for diagnosis and treatment recommendations.

** Please note that I get a small percentage of sales from the Amazon link above. However, I drink a lot of Bigelow tea and I am personally recommending it to my readers.

Free Printable: I Have, Who Has Colors

I have, Who Has-Color2.png

One more “I have, Who has?” game! This time, we are reviewing colors.

Traditional Rules: Pass out all of the cards. Player one reads their first card. The player that has the next color goes next. Play continues until all cards are called.

Example:

  • Player One: “I have red. Who has yellow?”
  • Player Two: “I have yellow. Who has blue?”
  • Player Three: “I have blue. Who has green?”

The game can be played with 2-11 children.

Single Player Rules: Lay all but one card on the floor face side up. Read the remaining card out loud. Have your child find the next card and continue until all of the cards have been picked up.

Example:

  • First card reads: “I have red. Who has yellow?”
  • Find the next card: “I have yellow. Who has blue?”
  • Find the next card: “I have blue. Who has green?”

For more practice, have the child find an object in the room that matches their card. For example “I have red, like our couch. Who has yellow?”

Download my Free I have, Who Has-Color Review Cards.

See my past posts for Alphabet, Shape, and Number review.

I recommend printing on cardstock and/or laminating the cards to make them more durable. I use a Scotch Laminator.

Bible Journaling on a Crayola Budget

Crayola Budget

If you think that you would enjoy Bible journaling but are worried that it will not fit into your budget, don’t worry about costs. Journaling is a creative process and when it comes to budgeting for it, we can get creative.

For me journaling is more about the process than the final results, so using simple supplies was not much of an issue.

The biggest initial expense in Bible Journaling is buying a “Journaling Bible.” These are special Bibles that have a wider margin and thicker paper than traditional Bibles. If you are like me and are living on a shoestring budget, even the $25 Bible seems like a big amount. In this case, you can read the passages from any Bible (or online if you do not own a Bible), then journal in any journal or notebook that you already own. My first week of journaling was done on plain copy paper and my son’s art paper.

There are no required tools for journaling. You can simply use your Bible, journal, and a pen or pencil. However, most people want to create a more colorful page. I started out by using tools that I already had around the house. I used regular pens instead of the nice archival pens. I used five of my son’s crayons as highlighters. I also had a box of Crayola colored pencils and an off brand children’s watercolor set.

I did have a little bit of supply envy after getting on Pinterest and reading blogs by others that do Bible journaling. So, I started a wish list and asked for supplies as Christmas and birthday presents. As I received these products, I noticed that my pages looked a little nicer. However, they were not necessary to build the relationship with God that I get through Bible journaling. For reference, the top image on this page was done with the Champs art supplies. The bottom image was done with the supplies listed in my last post.

Crayola Budget2

No Time For Coupons

I used to be big into extreme couponing! When my husband and I first got married, I was unemployed. My husband was in graduate school and worked as a shift leader at Blockbuster until after midnight most nights. So, I spent roughly twenty hours per week reading sales ads, matching coupons to sales, and shopping at three different stores. My friends made fun of my endless stash of toothpaste and toilet paper but I was convinced that super couponing was worth the effort.

However, as our family grew and our eating habits changed I began to have a few problems with couponing:

  1. Coupons are mostly for name brand products. I can usually buy generics for the same price or cheaper than the name brand with a coupon (especially when factoring in the cost of the paper I bought to get the coupons).
  2. Coupons usually don’t cover produce, dairy products, and meat. As we have begun to eat healthier, I have begun purchasing less pre-packaged boxed and frozen foods.
  3. Couponing takes time. As a busy mom of two, I don’t have the time to go to multiple stores and spend hours cutting coupons and planning my shopping trips.

Even though I love a good deal, I gave up on couponing for three years. That is when I discovered the Ibotta app and the Kroger app.

Kroger App

I primarily shop at Kroger because it is adjacent to our apartment complex and it seems to have a decent produce department. I save time by only going shopping at one store one time per week.

I downloaded the Kroger app, which features digital coupons and the weekly ad. When I downloaded the app, I linked the app to my Kroger Plus card. Each Friday, I go through the digital coupons and simply add the ones I want to use to my Kroger card by clicking the plus sign next to the desired coupon. When I go shopping at Kroger, I just swipe my Kroger Plus card and the coupon is automatically applied to my purchase. No clipping or extra time at the register required. My favorite part of the Kroger digital coupons is that they have a Free Item Coupon that you may download each Friday and redeem up to a week later.

I know many of my readers shop at other stores, so research your grocery store to see if a similar app is available.

The Kroger App is available on iTunes and in the Google Play Store.

Ibotta

Ibotta is a rebate app. Before I go shopping, I just select the store I wish to go to and browse the available rebates. I simply click on rebates I may use, answer a survey question or watch a brief video, and unlock the rebate. When I purchase the item, I simply scan my receipt (select stores allow you to link your store purchasing card to eliminate this step). After your rebate total becomes greater than $20 you can cash out to your paypal account or get a gift card to several popular stores.

Each week, Ibotta features a few “Any Brand” rebates such as $.50 off any brand of milk, eggs, or bananas. I buy mostly generic brands, so I appreciate this feature. They also offer bonuses when you redeem a certain number of rebates. In less than one month, I earned $35 in rebates simply by buying items I would otherwise buy.

If you sign up through my link, you will receive a $10 bonus when you redeem your first rebate and I will receive $5.

What ways do you like to save money that don’t take much time or effort?

Prayer For Humility

Lord,

Blessed are the poor in spirit (Matthew 5:3). You oppose the proud, but give grace to the humble (James 4:6). You bring down the mighty from their throne and exalt those of humble estate (Luke 1:52).

Help me to humble myself like a child, so that I may enter the kingdom of heaven (Matthew 18:2-4), because you have said “Whoever does not receive the kingdom of God like a child shall not enter it” (Mark 10:15).

Do not allow myself to justify myself before men because You know my heart and what is exalted among men is an abomination in the sight of God (Luke 16:15). So, then, what good is it to me if I gain the whole world but lose my soul? Help me to humble myself and to take up my cross daily to follow you (Luke1:23-25).

Amen

International Sports Day

According to my calendar, today is International Sport Day!

I have no idea what that really means. But, in a house full of boys, any reason to celebrate sports is taken advantage of.

So, we are making it the “Day of Sportsing.”

Our first sport is PVC Bowling. The rules are simple. Set pieces of leftover PVC pipe up like bowling pins and toss a ball at them. Squeals will ensue each time a pipe falls down.

Sport two is indoor soccer. The Champ and I will attempt to get a balloon past one another to score a point. At some point, the Champ will start using his hands and this will turn into more of a weird version of volleyball, until the balloon touches the popcorn ceiling and pops, scaring the dogs and ending our game.

Sport three is football. We take turns holding the foam football with our finger while the other one kicks it. At some point, the Champ will remove the football right before I kick, a la Lucy from Charlie Brown.

Sport four is baseball. We will take turns hitting a ball off of a tee. Mommy cannot catch, so she will miss every hit. Ethan will end up getting distracted by an interesting weed, ending the game entirely. Thus concludes the “Day of Sportsing.”

Comment on your favorite “Toddler Friendly Sports.”

Free Printables: I Have, Who Has? Shapes Review Cards

Shape

Over the last two weeks, I explained the game “I have, Who has?” for the letters of the alphabet and number review. This game can also be used to review shapes.

Traditional Rules: Pass out all of the cards. Player one reads their first card. The player that has the next shape goes next. Play continues until all cards are called.

Example:

  • Player One: “I have heart. Who has star?”
  • Player Two: “I have star. Who has square?”
  • Player Three: “I have square. Who has circle?”

The game can be played with 2-11 children.

Single Player Rules: Lay all but one card on the floor face side up. Read the remaining card out loud. Have your child find the next card and continue until all of the cards have been picked up.

Example:

  • First card reads: “I have heart. Who has star?”
  • Find the next card: “I have star. Who has square?”
  • Find the next card: “I have square. Who has circle?”

Download my I have, Who Has-shapes. Come back next week for Color Review.

I recommend printing on cardstock and/or laminating the cards to make them more durable. I use the Scotch Thermal Laminator.

Bible Journaling: Tools of the Trade Part 2

Tools of the Trade2

Last week, I talked about my journaling Bible and the tools I use as I am reading. This week, I want to focus on the tools I use for illustrating my journaling Bible.

Pencil.

You can use whatever pencil fits your style best. I use a regular No. 2 wooden pencil. I love Ticonderoga Pencils. They are fairly inexpensive, have a great eraser, and don’t seem to break as much as traditional pencils. If you go with a wooden pencil, make sure to have a pencil sharpener in your arsenal of supplies. Mechanical pencils are great for smaller detail and you don’t have to worry about sharpening them.

There are a variety of artist pencils on the market and the difference is in the lead. The amount of smudging a pencil does will be based on hardness and how dark a pencil marks is based on blackness. No. 2 pencils fall in the middle of the hardness and blackness scales, so you can adjust accordingly.

Eraser.

My husband (The Coach) picks on me for being an eraser snob. I have only used White Pearl Erasers since high school. They don’t leave any smudge marks and are inexpensive.

Pencil Sharpener.

This is an area where I am not picky. I just use the simple pencil sharpener that came with my son’s Ticonderoga pencils. I know that some of you out there will prefer an electric pencil sharpener, but I prefer all of my tools be portable.

Colored Pencils.

Crayola is the way to go here. I prefer Crayola Twistable Colored Pencils because they are pretty and you do not have to sharpen them. I started out with the traditional Crayola colored pencils. They worked fine until Swayze realized he loved the taste of wood. He has not even attempted to eat my Twistables (yet).

Pens.

I started my Bible Journaling journey with my favorite pen straight out of my pencil cup. It was a Uni-Ball Vision Pen and it glided over paper like butter and was fairly inexpensive. The ink was beautiful and dark and really made the colors on my page stand out. I was journaling on my son’s drawing paper, not in a Bible, so I did not really care about bleeding through.

Once I moved to my Bible, I switched to a pen from my bank. It worked fine for a few days. The ink was not bleeding through. The color was still standing out and the pen was free. However, I got tired of seeing the indentions on the next page from where I was writing. I was able to solve this problem some by placing a piece of cardstock between the pages while I worked; however, pressing down still showed up on the backside of the page.

I quickly went out  to the craft store and bought Micron Ink Pens. These are an archival ink, which means they are going to be rich in color, be less likely to bleed through, and not fade away. They come in different tip sizes. I started out with an 01, 03, and 05 which range from 0.25mm through 0.45mm. Just as a frame of reference, most mechanical pencils have a tip of 0.5mm or 0.7mm. I love the fine tip because it really allows me to draw in fine detail. These pens come in bigger sizes and a smaller size as well. So far, I have discovered that I like my 005, 01, and 02 the most. I don’t like using the bigger sizes because I can see the shadow from where I have written on the back side of the page. These also come in a multicolored pack.

For the perfectionist, you may want to try Pilot FriXion Erasable Gel Pens. I do not have any personal experience with these; however, they have piqued my interest. They write like a ball point pen, come in a variety of colors and are erasable.

Watercolors.

I started off using a set of dollar tree watercolors from the kid’s craft section. I was reluctant to buy a set of Sakura Watercolors, but I was gifted a set at Christmas. They are in fact amazing. The colors are vibrant and I have a lot more options to choose from. My only complaint was the waterbrush that was included. It screws on counterclockwise, and I broke it by overtightening when I intended to open it. I simply use a regular paintbrush with the kit now, but you can purchase replacement waterbrushes if you need to.

Come back next week for a look at “Tips and Techniques for Non Artists.”

*Please, note that I get a small percentage of sales from the Amazon links above. However, I use all of these products myself (except where clearly noted) and I am personally recommending them to my readers.

Amateur Catering On a Dime

This week I was given the opportunity to cater an event. My client was very easy to please, so I knew that creating a menu would not be the challenge. (Did I mention that the “client” was the Coach, and I was doing this for free?) My real challenge was working on a shoe string budget of $300, and I am proud to say that I came in under budget by $50!

Here is what I learned from my amateur catering experience.

Plan for the maximum number of people. The event only had 15 RSVPs, but hundreds of people were invited. We settled on planning for 80 people to attend. For a thirty minute reception at 5:00 p.m., we assumed 8 pieces of food per person (around 800 pieces of food total). It turned out there were actually only 20 people in attendance, but half of our food was eaten. We donated the remainder of the food to a very appreciative police precinct.

Know where to shop (and what to shop for). Serving trays and utensils are great finds at Dollar Tree. They have a variety of clear plastic that looks elegant and we were able to get everything we needed for less than $10. Warehouse stores are great for anything that needs to be purchased in bulk. We purchased almost all of our food from Sam’s Club.

Shop prepared. Bring a calculator and a pad of paper. While I did not know my menu in advance of shopping, I went in knowing that I wanted three desserts, two savory foods, and two salty snacks. I wrote down the price and quantity of each item as I added it to my cart. Towards the end, I used my calculator to ensure I was well within my budget.

Know your facility’s policies. The facility that our event was hosted in does not allow water bottles to be served. This came as a shock to me. My original plan was to buy six cases of water. Instead, I had to plan on cups, ice, and gallons of tea and water. This increased my cost and took up more room in my refrigerator.

Remember your wallet. Maybe this tip is only specific to me and my “mommy brain.” When I walked up to the checkout line, I realized that I had left my debit card at home in my diaper bag. I had to call the Coach to come bail me out.

Clean out your freezer. All of our food had to be stored somewhere. The night before I went to buy all of the food, I cleaned out our deep freezer and refrigerator. Good thing, too! The food fit perfectly in the space I cleared out.

Keep everything away from the kids! This one is pretty self-explanatory. Somehow your toddler will just know that there are tons of desserts and snacks nearby. Make sure everything is kept well out of reach, or you may spend part of your budget replacing food that was “accidentally” knocked over.

Give yourself plenty of set-up time! We live in a city that has some heavy traffic around the time I needed to set-up. In order to have an hour to set up, I planned to leave thirty minutes earlier than I normally would have. I did not have any problems with traffic, but it turned out that I needed the extra time for set-up.

I hope these tips help you the next time you are planning a party or an event.

Download my Menu Plan. There are blank copies for you to use for your event, as well as sample filled out pages from mine.

Prayer Against the Enemy


Lord,

You are a faithful God and nothing in all creation will ever be able to separate me from your love that is revealed in Christ Jesus our Lord (Romans 8:38-39). I will give thanks to you because your love endures forever (2 Chronicles 21). Help me to not have fear because you are with me. You will strengthen me, help me, and uphold me with your righteous hand (Isaiah 41:10).

Help me to recognize who my battle is truly against (Ephesians 6:12). I will surrender to you, Lord, because the battle is yours (2 Chronicles 15). I know that the enemy will flee from you (Psalm 68:1) and not have victory over me (Psalm 30:1). You will give me strength and protect me from him (2 Thessalonians 3:3). Be a light when I am in darkness (Micah 7:8). Keep me from temptation and guard me from the evil one (Matthew 6:13).

Amen